Azure HDInsight
We recommend you install Lenses with HDInsight Kafka cluster. You can install Lenses as an HDInsight application in two ways:
- When creating HDInsight Kafka cluster, or
- Lenses can be added to an existing cluster via a template or the HDInsight dashboard (recommended).
To install as a standalone VM please use the Azure Marketplace.
Prerequisites
- Azure subscription
- HDInsight Kafka in 3.6 or 4.0 version
Installing when creating a cluster
Create a HDInsight cluster in Azure.
- Select
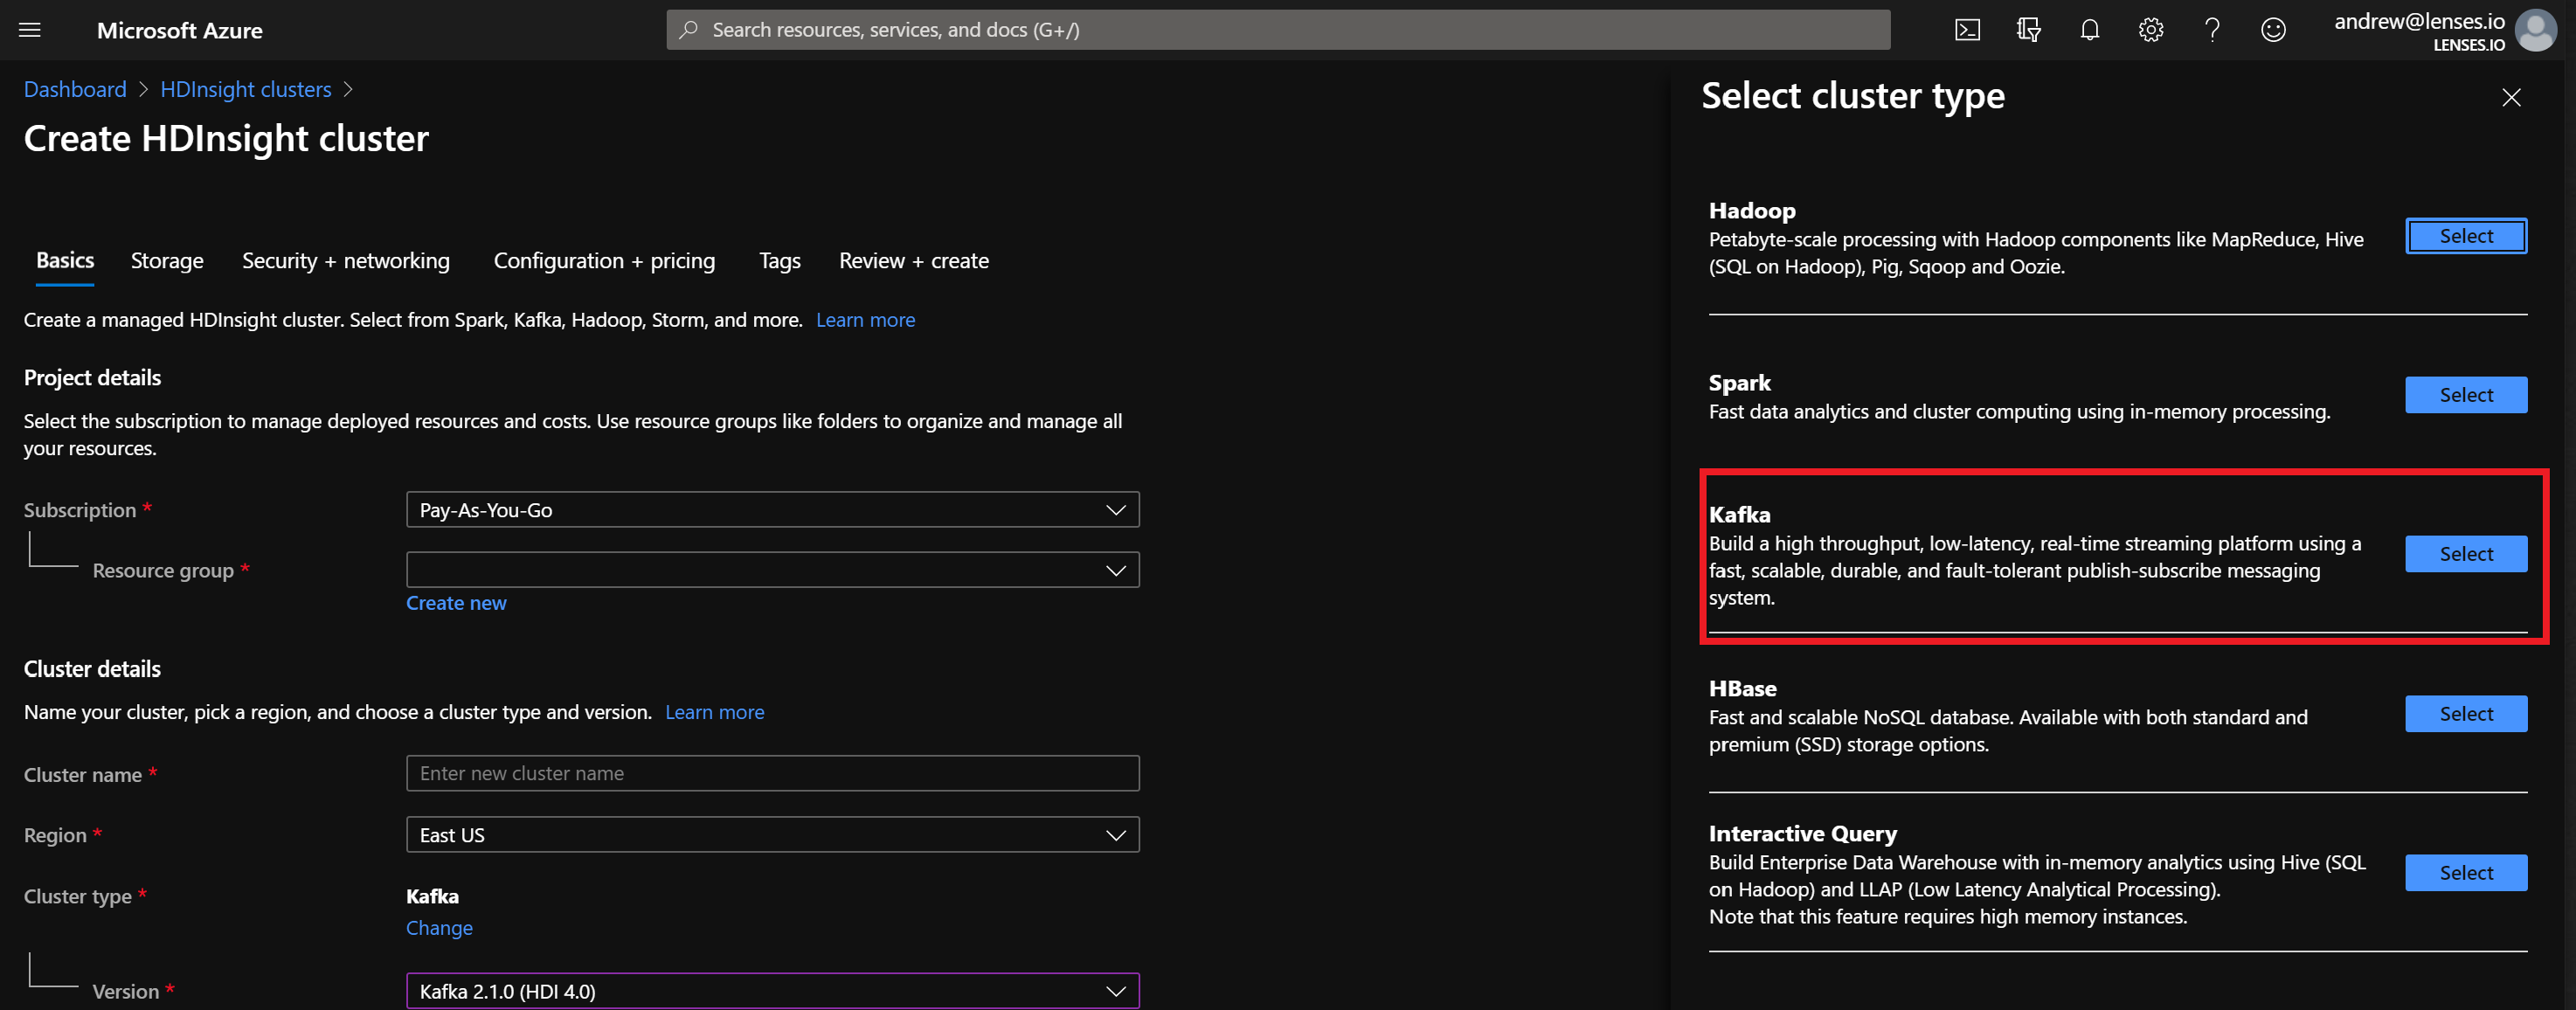
Kafkaas theCluster Type, enter the requested details, click next and configure the storage.
- On the
Configuration & Pricingtab, clickAdd Application.
- Select Lenses in the
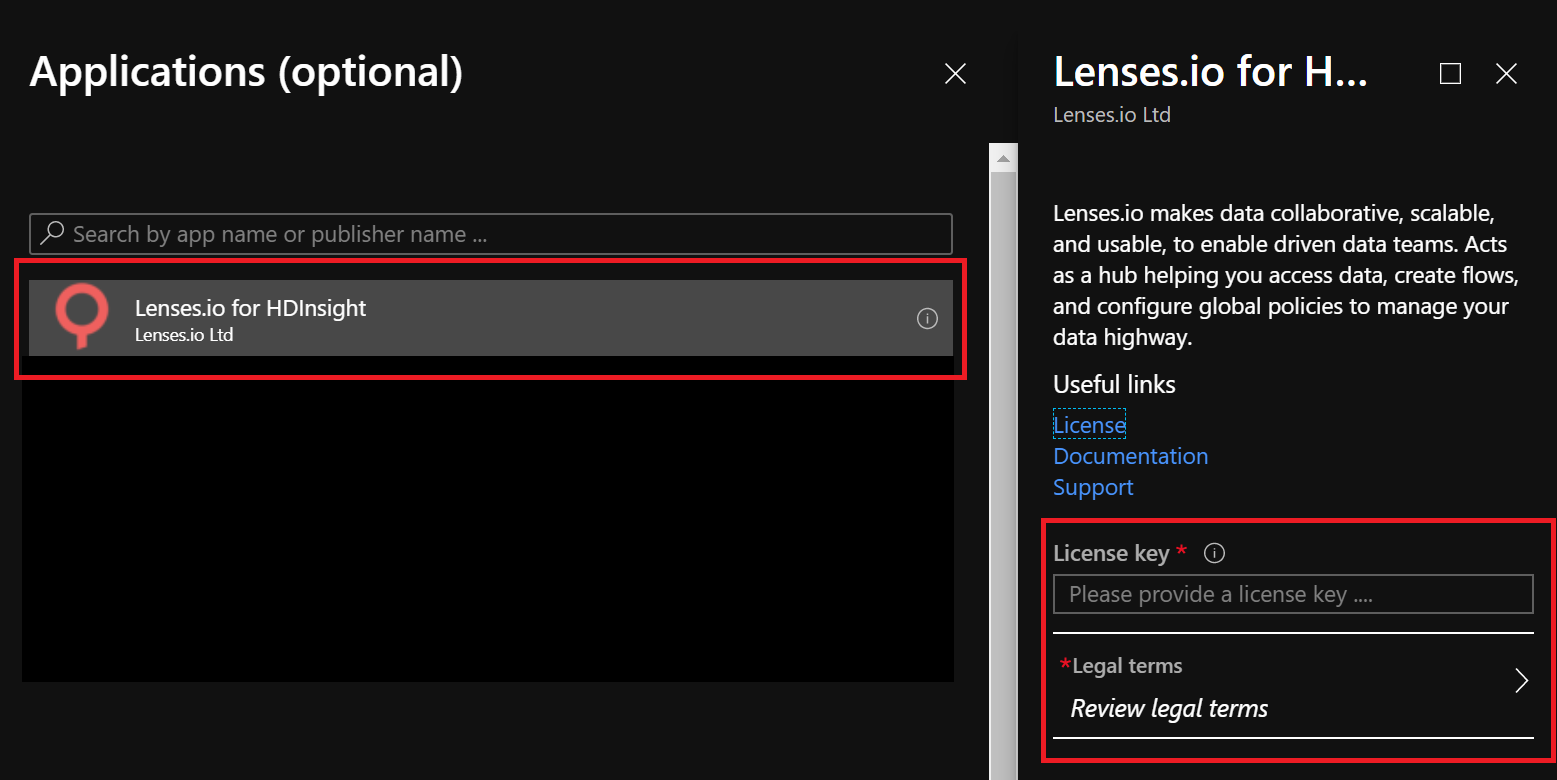
Applicationblade, enter a valid license and accept the terms.
Warning
Make sure to insert the full JSON license!
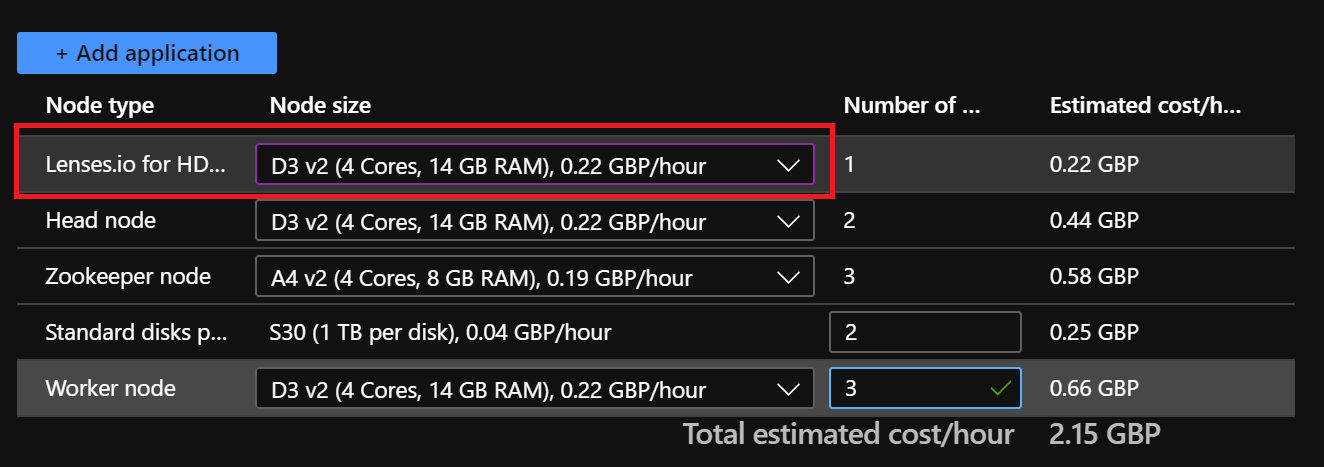
- Select the VM size for Lenses:
Lenses will be installed and auto configured on an edge node of the HDInsight cluster. To configure Zookeeper metrics see here.
Once the deployment is complete, in the Applications section on the left hand side menu, select Lenses, click the URI to go to Lenses and login with admin/admin.
Installing against an existing cluster
Lenses can be install against an existing cluster and will be installed and auto configured on an edge node of the HDInsight cluster. TTo configure Zookeeper metrics see here.
You can either install Lenses as an application from the HDInsight dashboard or via a template.
Installing via the HDInsight Dashboard
- Select the cluster in the Azure portal
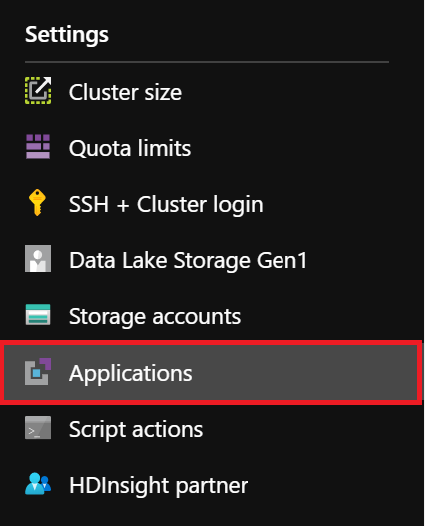
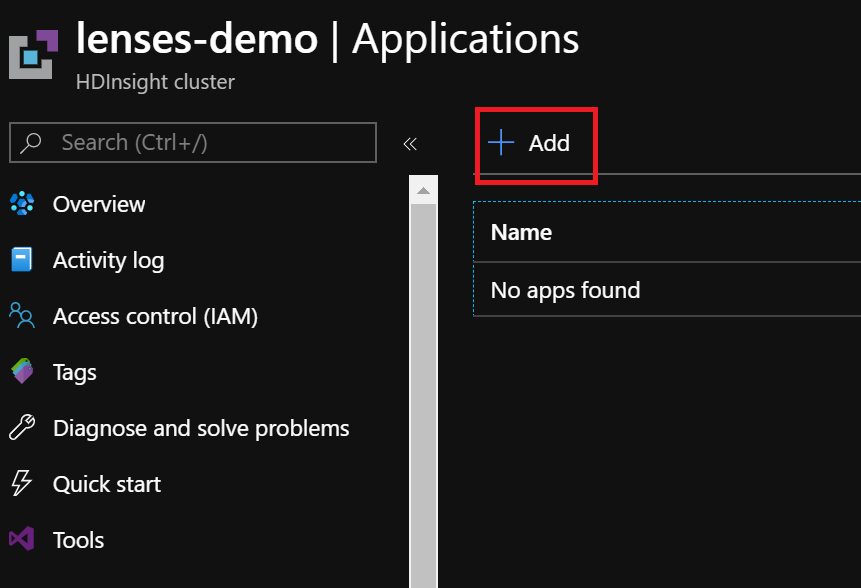
- Select Application from the left hand side menu
- Add a new application
- Select Lenses from the Application blade, provide the license and accept the terms.
Warning
Make sure to insert the full JSON license!
In the Applications section on the left hand side menu, select Lenses, click the URI to go to Lenses and login with admin/admin.
Installing via a template with a HDInsight cluster
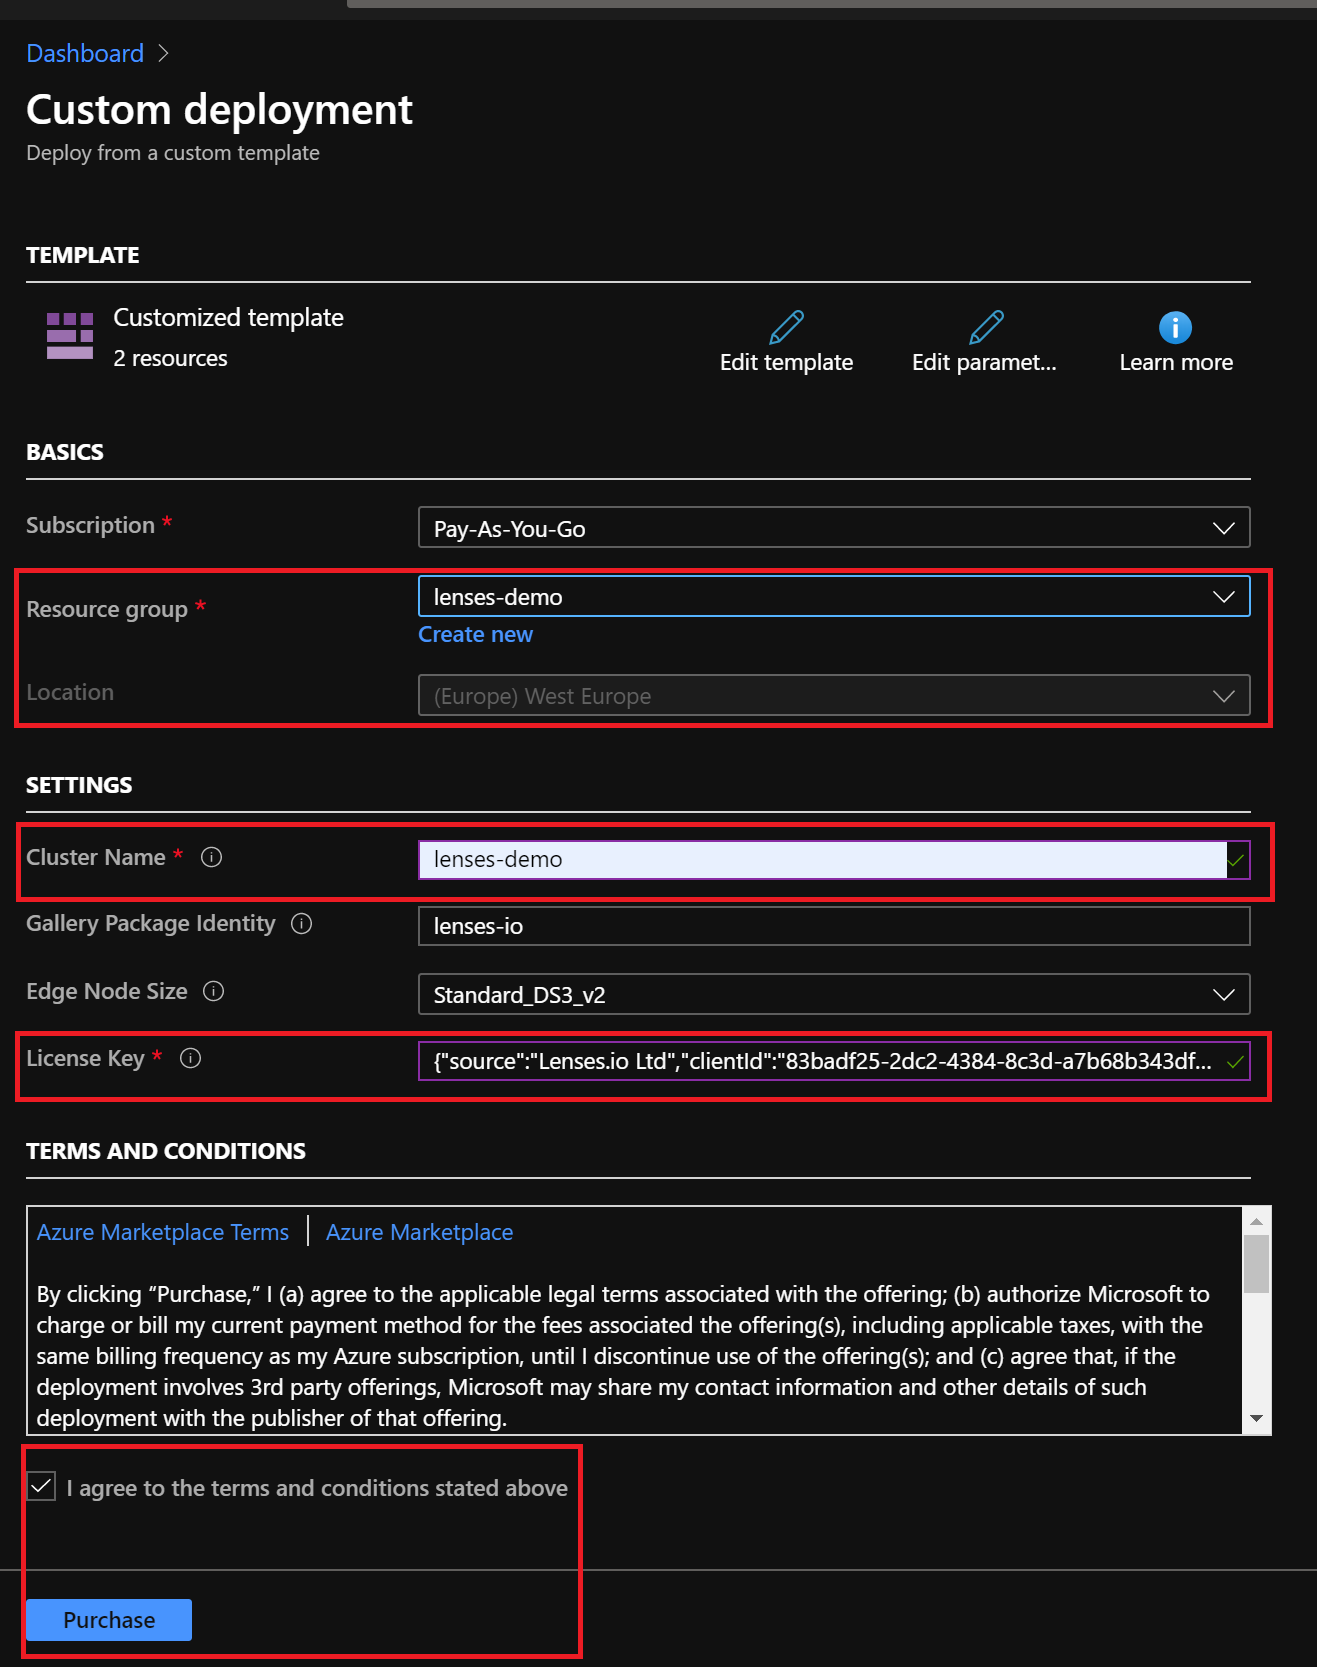
Enter your resource group, location, HDInsight cluster name, license and accept the terms and conditions and click create:
Warning
Make sure to insert the full JSON license!
Once the deployment is complete, in the Applications section on the left hand side menu, select Lenses, click the URI to go to Lenses and login with admin/admin.
Kubernetes with Helm
- Nginx Controller
Lenses can be deployed with Nginx Ingress Controller in Azure with the following commands and additions in provided values for Lenses helm chart.
# Install NGINX Ingress controller
helm repo add incubator https://kubernetes-charts-incubator.storage.googleapis.com/
helm install stable/nginx-ingress --name <RELEASE-NAME>

# This will return the generated URL for Nginx Load Balancer
kubectl --namespace <THE-NAMESPACE-YOU-USED-TO-DEPLOY> get services -o wide -w <RELEASE-NAME>
When you run the above commands the NGINX ingress controller will be created and you will get an EXTERNAL IP. For Lenses ingress deployment with Helm, you need an FQDN for host value. You need to run the following script to generate a DNS name:
#!/bin/bash

# Public IP address of your ingress controller
IP="<EXTERNAL-PUBLIC-IP-ADDRESS>"

# Name to associate with a public IP address
DNSNAME="<YOUR-DNS-NAME>"

# Get the resource-id of the public ip
PUBLICIPID=$(az network public-ip list --query "[?ipAddress!=null]|[?contains(ipAddress, '$IP')].[id]" --output tsv)

# Update public ip address with DNS name
az network public-ip update --ids $PUBLICIPID --dns-name $DNSNAME
Now you need to fill the following values for Lenses Helm deployment:
restPort: 3030
servicePort: 3030

service:
  enabled: true
  type: ClusterIP
  annotations: {}

ingress:
  enabled: true
  host: <GENERATED-LB-NGINX-URL>

  annotations:
    kubernetes.io/ingress.class: nginx
- Traefik Controller
Lenses can be deployed with Traefik Ingress Controller in Azure with the following commands and additions in provided values for Lenses helm chart.
# Install NGINX Ingress controller
helm repo add incubator https://kubernetes-charts-incubator.storage.googleapis.com/
helm install stable/traefik --name <RELEASE-NAME>

# Traefik's load balancer state
kubectl get svc <RELEASE-NAME>-traefik -w

# Once 'EXTERNAL-IP' is no longer '<pending>':
kubectl describe svc <RELEASE-NAME>-traefik | grep Ingress | awk '{print $3}'
When you run the above commands the Traefik ingress controller will be created and you will get an EXTERNAL IP. For Lenses ingress deployment with Helm, you need an FQDN for the host value. You need to run the following script to generate a DNS name:
#!/bin/bash

# Public IP address of your ingress controller
IP="<EXTERNAL-PUBLIC-IP-ADDRESS>"

# Name to associate with a public IP address
DNSNAME="<YOUR-DNS-NAME>"

# Get the resource-id of the public ip
PUBLICIPID=$(az network public-ip list --query "[?ipAddress!=null]|[?contains(ipAddress, '$IP')].[id]" --output tsv)

# Update public ip address with DNS name
az network public-ip update --ids $PUBLICIPID --dns-name $DNSNAME
Now you need to fill the following values for Lenses Helm deployment:
restPort: 3030
servicePort: 3030

service:
  enabled: true
  type: ClusterIP
  annotations: {}

ingress:
  enabled: true
  host: <GENERATED-LB-TRAEFIK-URL>

  annotations:
    kubernetes.io/ingress.class: traefik
Note
- If you receive an error with the service account which you will use (eg. default) about the followings:
- Failed to list v1.Endpoints: endpoints is forbidden: User
- Failed to list v1.Service: services is forbidden: User
Then you need to bind your service account with role cluster-admin with the following RBAC YAML:
apiVersion: v1
kind: ServiceAccount
metadata:
  name: tiller
  namespace: kube-system
---
apiVersion: rbac.authorization.k8s.io/v1beta1
kind: ClusterRoleBinding
metadata:
  name: tiller
roleRef:
  apiGroup: rbac.authorization.k8s.io
  kind: ClusterRole
  name: cluster-admin
subjects:
  - kind: ServiceAccount
    name: tiller
    namespace: kube-system
- Application gateway
Lenses can be deployed with Azure Application gateway. You need to follow the official repository documentation here.
When you run the above commands the Application Gateway ingress controller will not be created till you deploy Lenses which includes an ingress configuration for Application gateway. You need to add the following options:
restPort: 3030
servicePort: 3030

service:
  enabled: true
  type: ClusterIP
  annotations: {}

ingress:
  enabled: true
  host:

  annotations:
    kubernetes.io/ingress.class: azure/application-gateway
Then check the Load balancer DNS FQDN with:
kubectl get ingress -o wide -w
If you specify a host for ingress, you need to add Application Gateway address to Azure DNS to be able to access it externally. Or, deploy external DNS to manage Azure DNS records automatically, which is also recommended.
