Azure
Lenses integrates and can be deployed in Microsoft Azure with an HDInsight Apache Kafka or your own Apache Kafka cluster and it is available in Azure Marketplace. Based on Hardware & OS requirements for Lenses, we recommend to start with Standard_DS2_v2 instances or any other instance type with >= 7GB.
Marketplace
- HDInsight
- Lenses will be deployed as an edge node in your HDInsight cluster and the installation requires zero configuration. The only field which you need to fill in is the license for Lenses as JSON payload.
- Azure VM
Lenses will be installed in the Virtual Machine and the fields which you need to fill in are the followings:
License for Lenses as JSON payload (Required)
Port which will be used to run Lenses. (Required)
Kafka Brokers as a comma-separated string (Required). For example:
PLAINTEXT://broker.1.url:9092,PLAINTEXT://broker.2.url:9092
Zookeeper as a one-line JSON payload (Optional). For example:
[{url:"zookeeper.1.url:2181", metrics:{url:"zookeeper.1.url:9585", type: "JMX"}},{url:"zookeeper.2.url:2181", metrics:{url:"zookeeper.2.url:9585", type:"JMX"}}]
Schema Registry as a one-line JSON payload (Optional). For example:
[{url:"http://schema.registry.1.url:8081", metrics:{url:"schema.registry.1.url:9582", type: "JMX"}},{url:"http://schema.registry.2.url:8081",metrics:{url:"schema.registry.2.url:9582", type: "JMX"}}]
Connect as a one-line JSON payload (Optional). For example:
[{name:"data_science",urls: [{url:"http://connect.worker.1.url:8083", metrics:{url:"connect.worker.1.url:9584", type: "JMX"}},{url:"http://connect.worker.2.url:8083",metrics:{url:"connect.worker.2.url:9584", type: "JMX"}}],statuses:"connect-statuses-cluster-a", configs:"connect-configs-cluster-a", offsets:"connect-offsets-cluster-a"}]
Deployment
- HDInsight
In HDInsight, Zookeeper nodes haven’t enabled by default the JMX ports. You need to visit your HDInsight’s Ambari dashboard in this page
<your-hdinsight-cluster-name>.azurehdinsight.net/#/main/services/ZOOKEEPER/configs. Choose the menu item of Advanced zookeeper-env and then paste the following at the top:JMXPORT=<YOUR-PREFERRED-JMX-PORT>
This Zookeeper JMX port is not possible to be autodetected by Lenses because of a limitation of HDInsight, so you need to manually SSH in the Lenses edge node machine and change the zookeeper configuration in
lenses.confunder the path/opt/lenses. Then restart the Lenses service:systemctl restart lenses-io.service
- Common VNET
- You can deploy Lenses in the same VNET with your HDInsight Apache Kafka and you can use directly the provided FQDNs for Brokers and Zookeeper by HDInsight.
- VNET-to-VNET with Peering
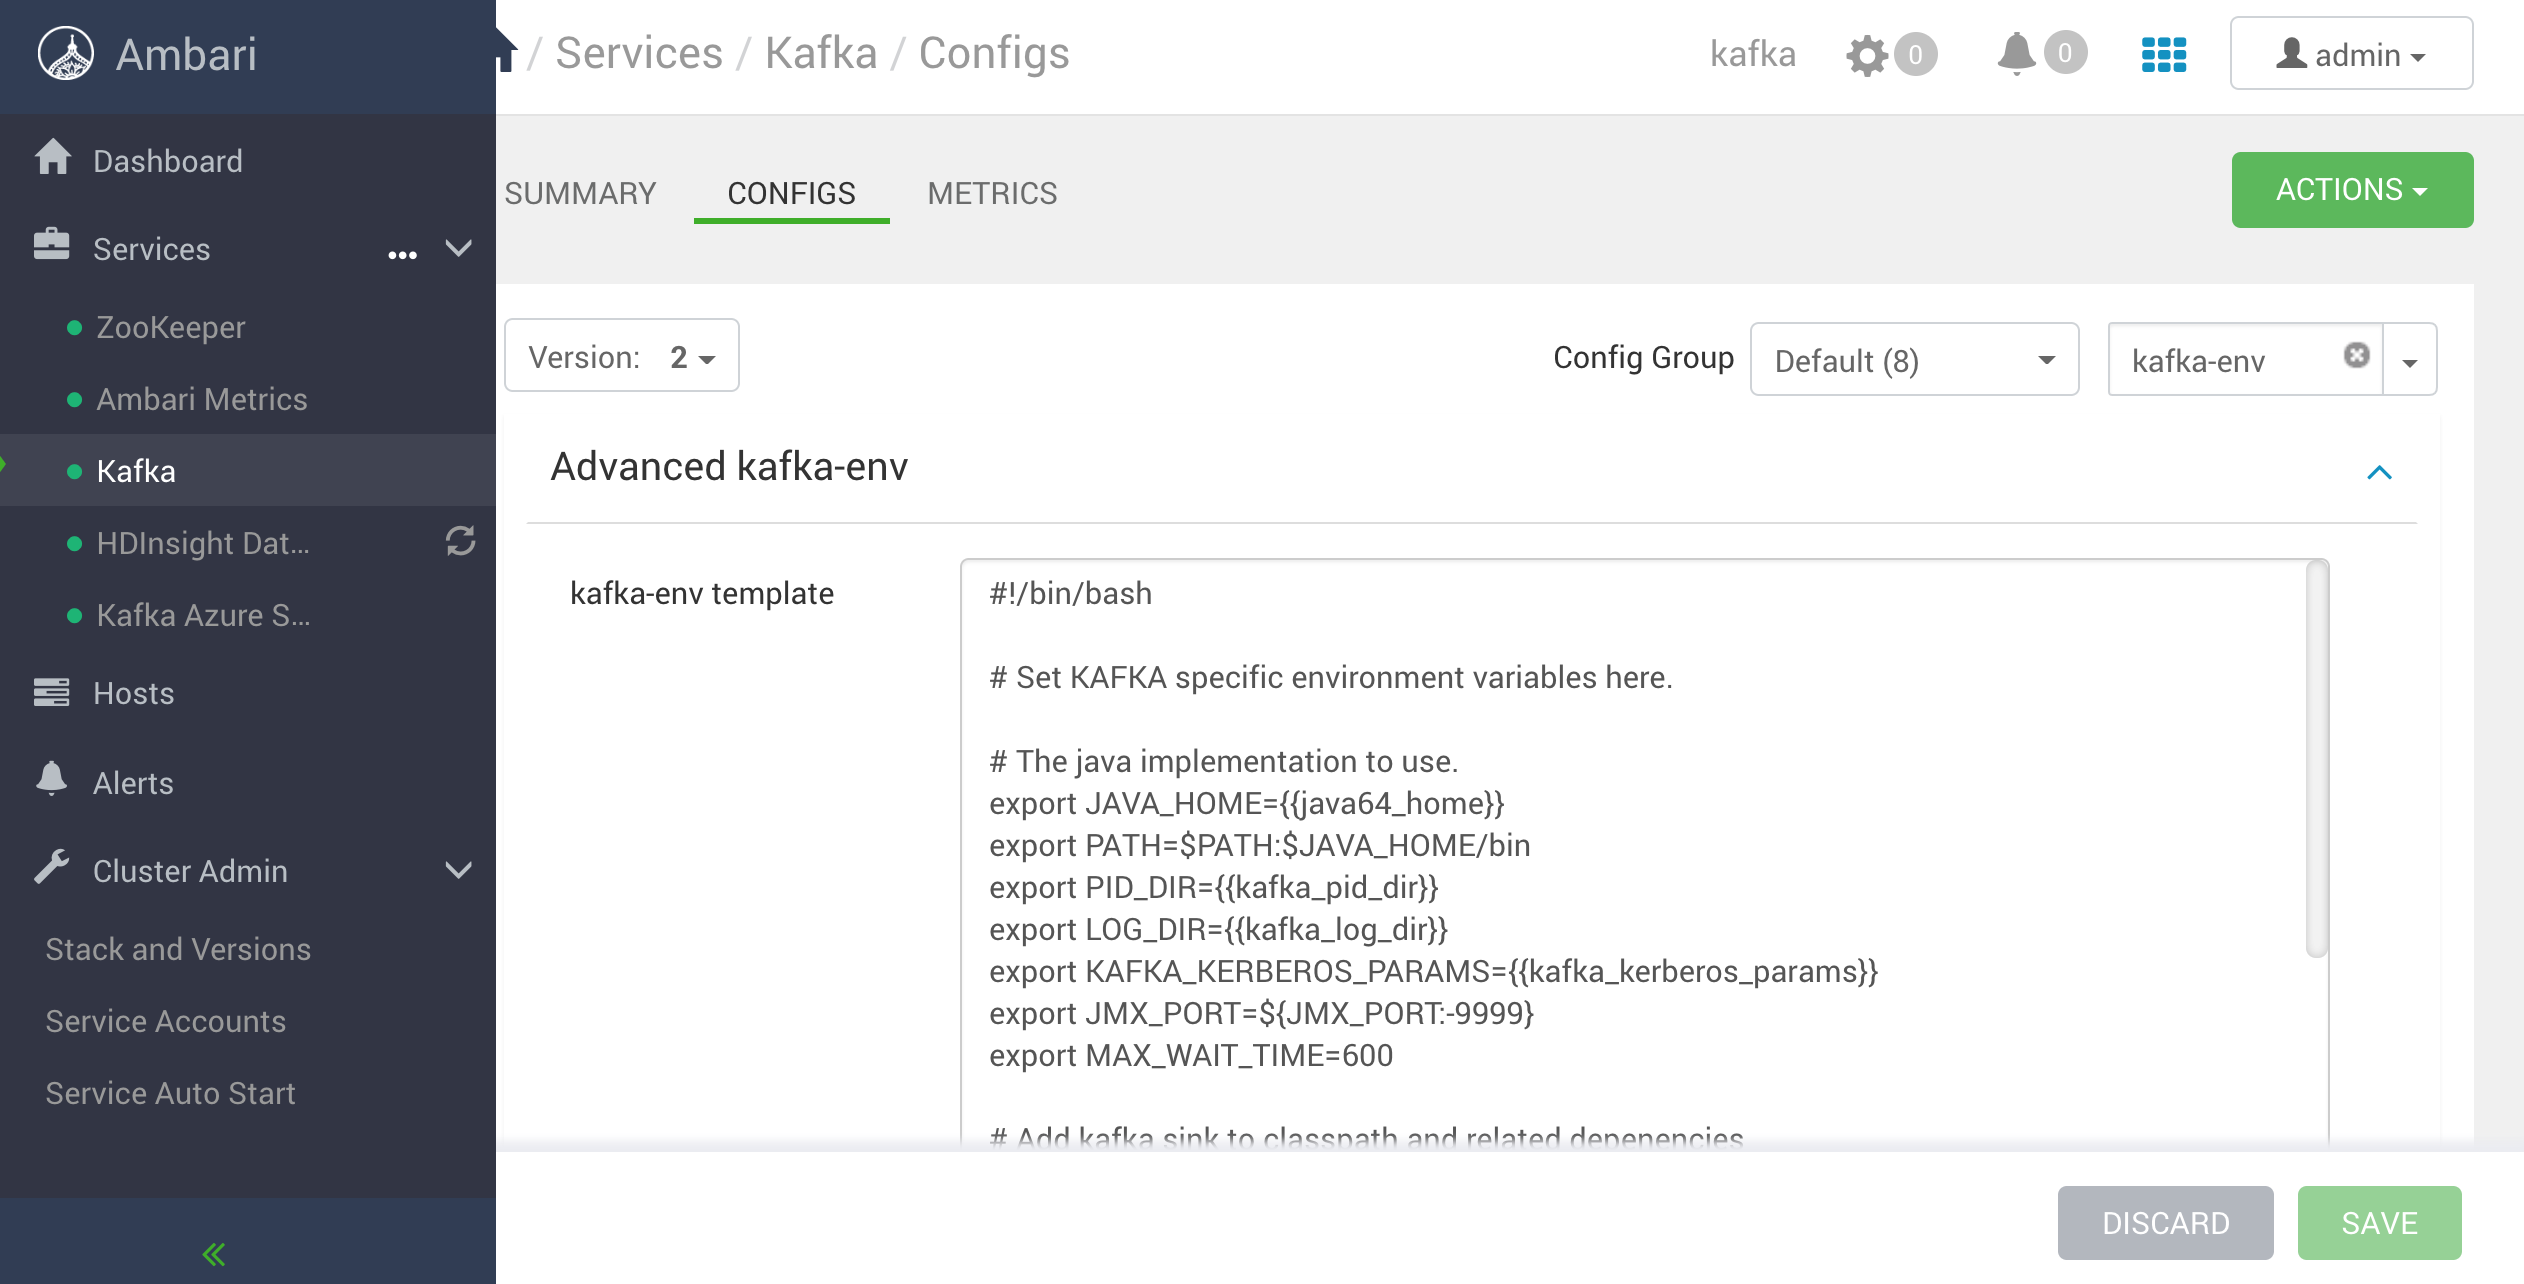
You can deploy Lenses in the different VNETs by your HDInsight Apache Kafka and in this case, you cannot use the provided FQDNs by HDInsight. You need to visit the HDInsight admin panel and in Kafka Service you need to filter the configuration with kafka-env configuration as the image shows:
 HDInsight Kafka-Env configuration
To configure Kafka to advertise IP addresses, just add the following text to the bottom of the kafka-env-template field:
# Configure Kafka to advertise IP addresses instead of FQDN
IP_ADDRESS=$(hostname -i)
echo advertised.listeners=$IP_ADDRESS
sed -i.bak -e '/advertised/{/advertised@/!d;}' /usr/hdp/current/kafka-broker/conf/server.properties
echo "advertised.listeners=PLAINTEXT://$IP_ADDRESS:9092" >> /usr/hdp/current/kafka-broker/conf/server.properties
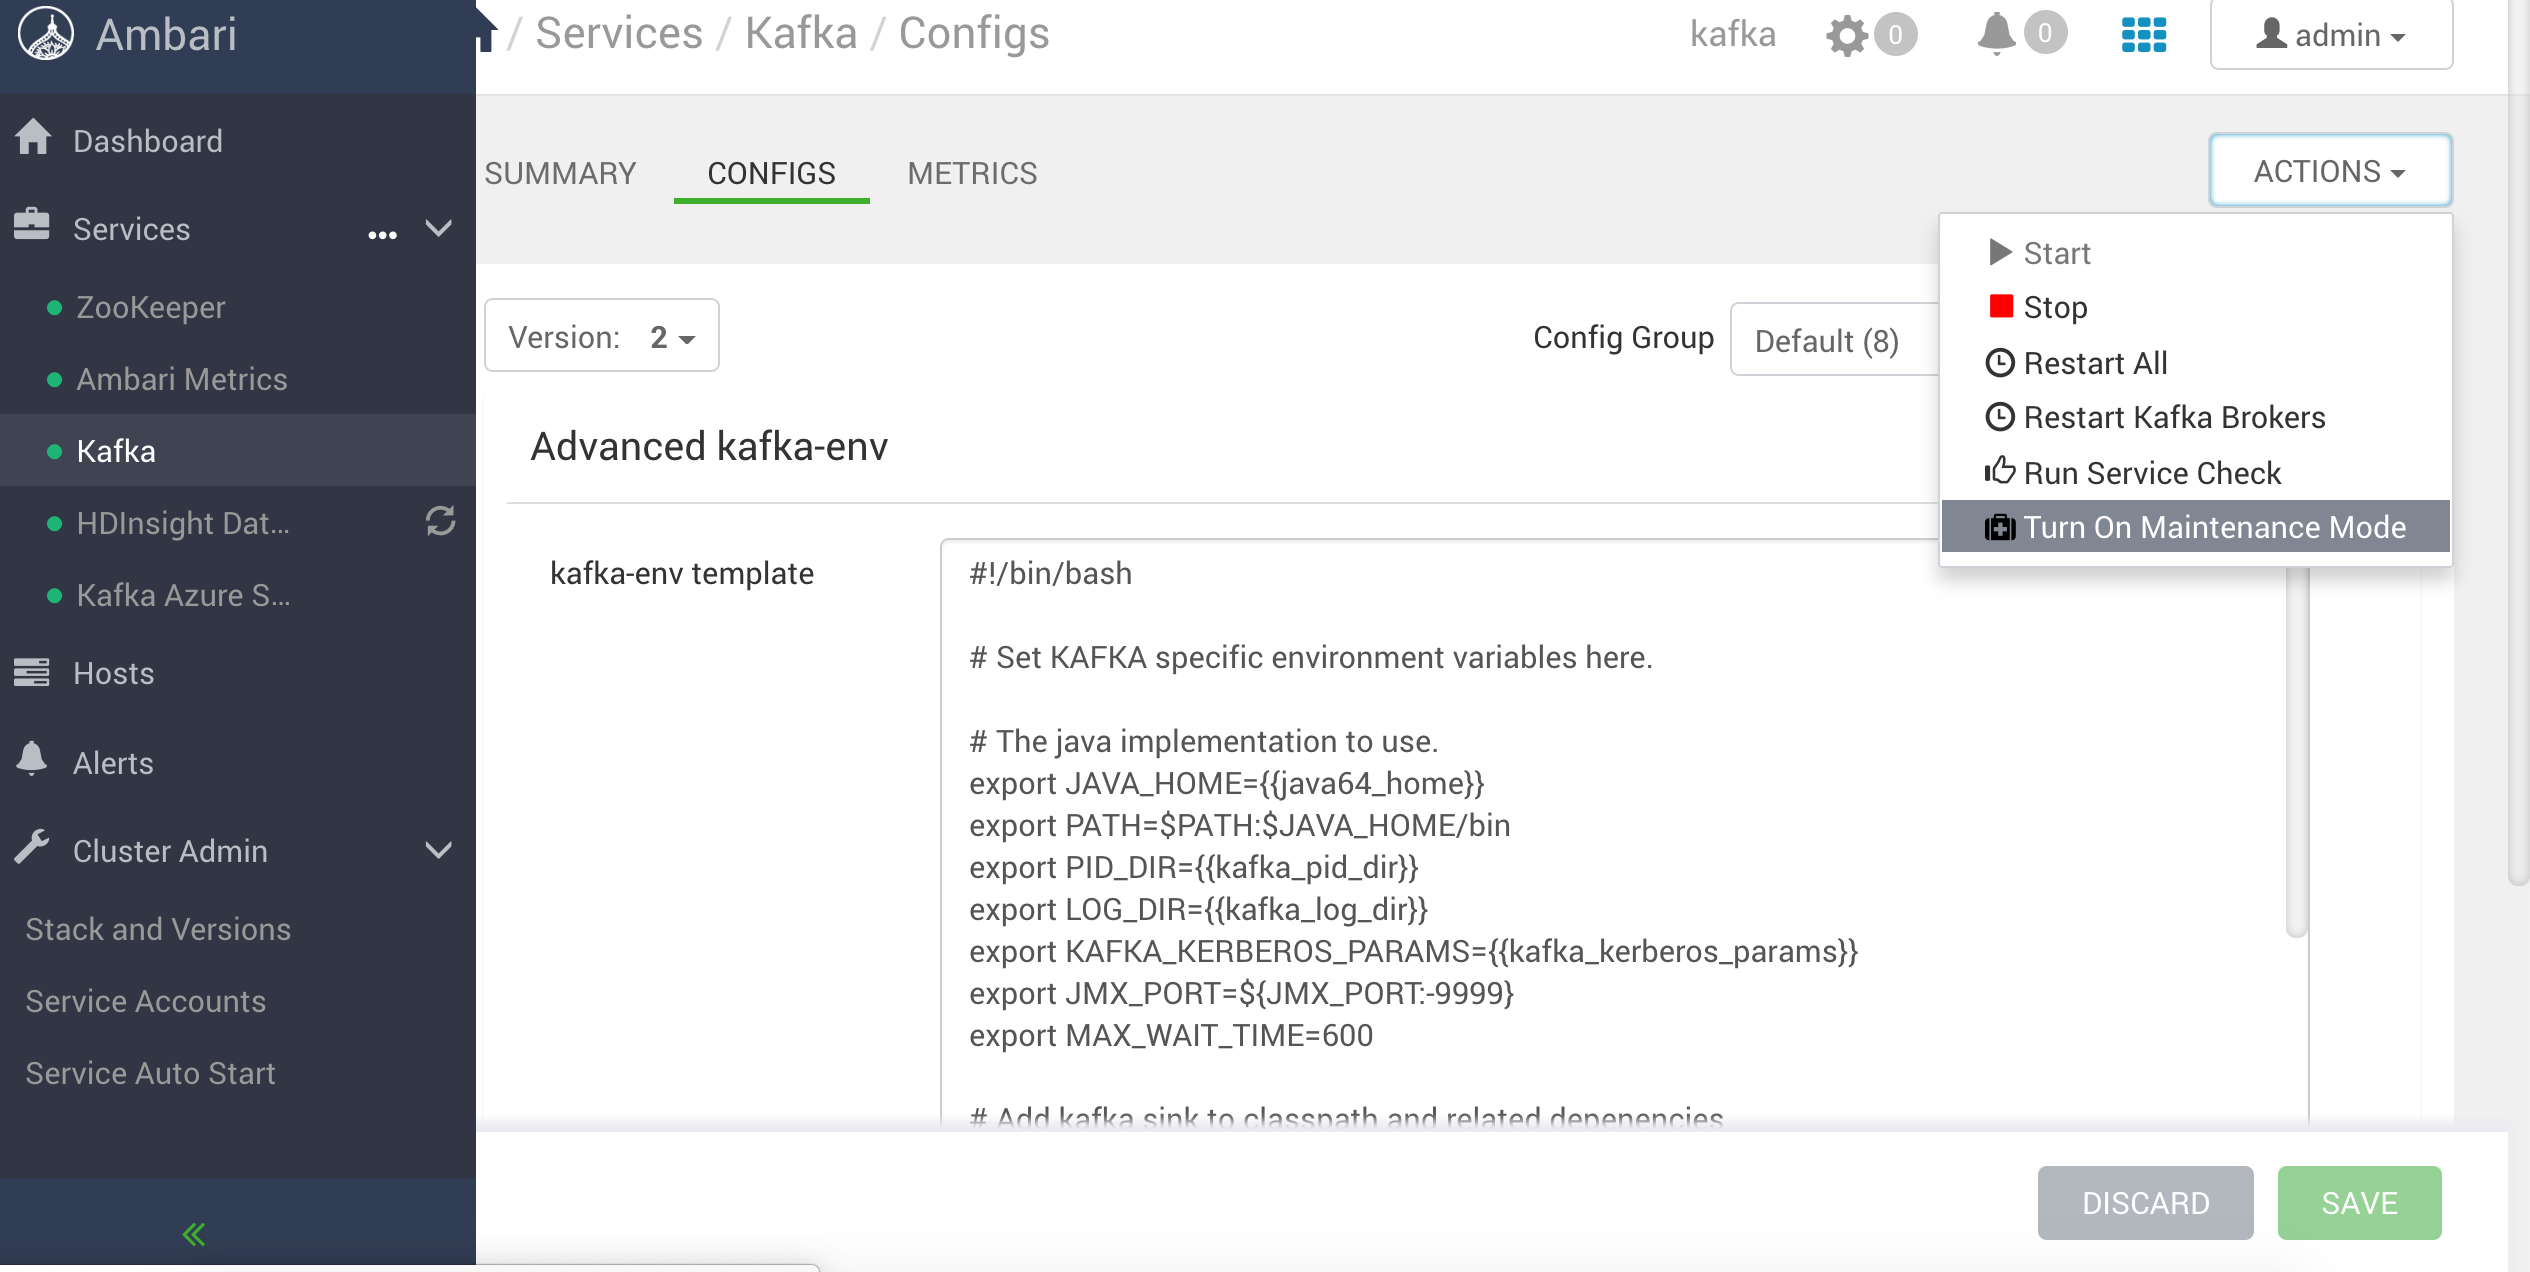
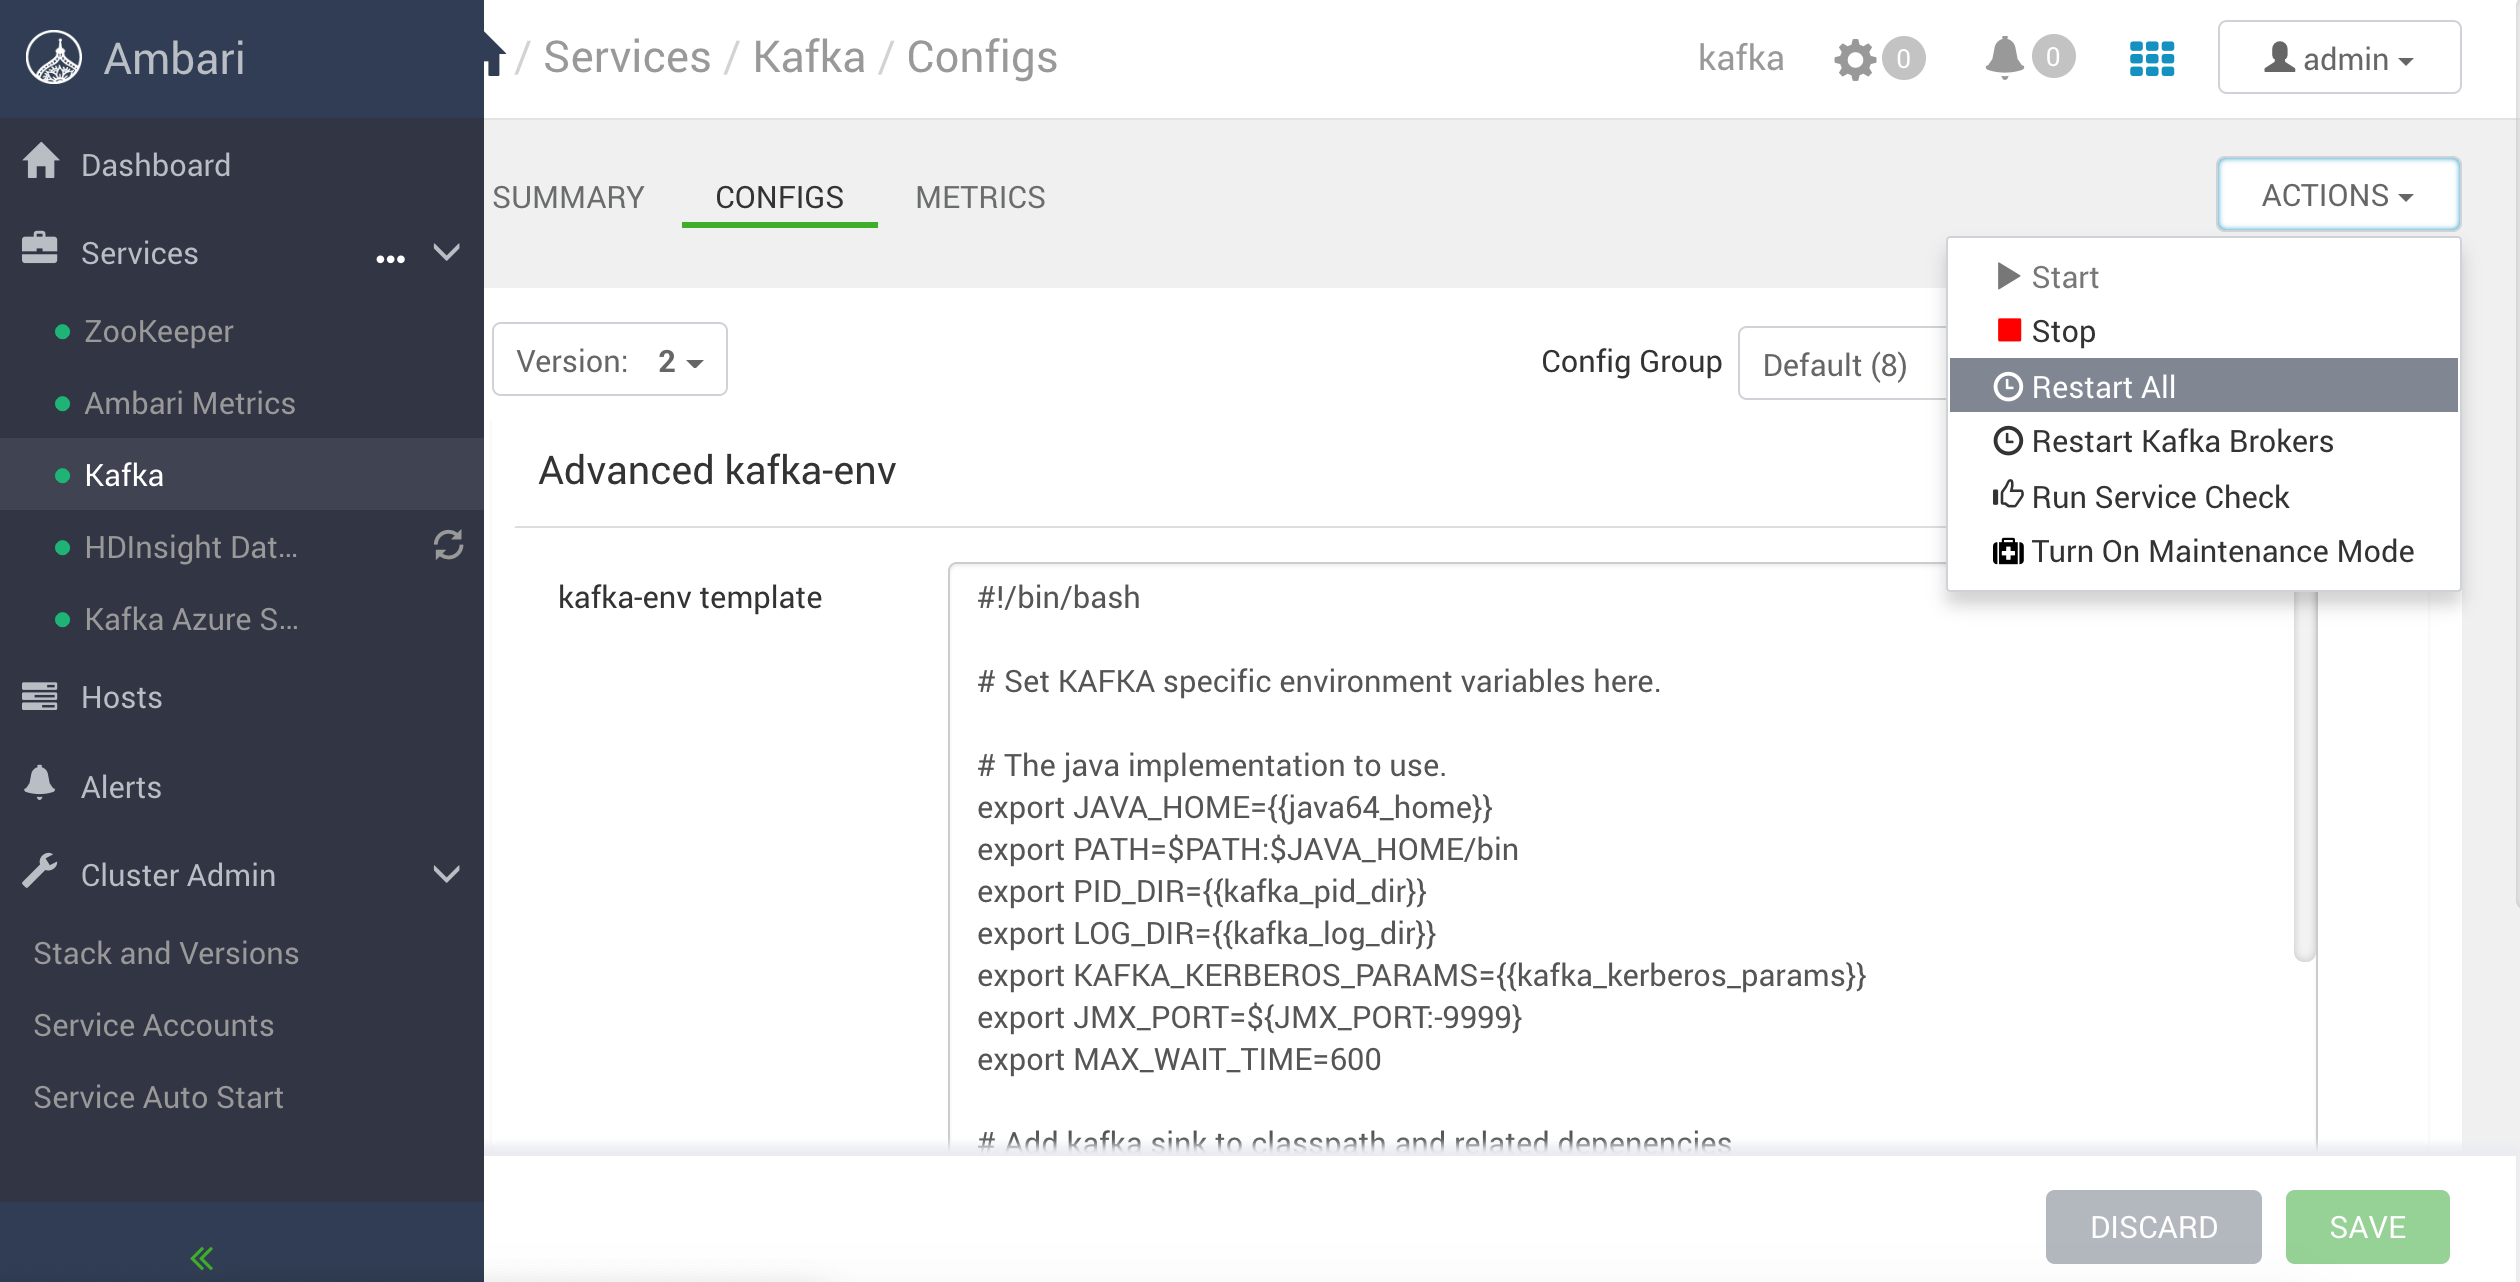
After you have configured the Kafka Service of HDInsight you need to turn on the maintenance mode in actions and then click on restart all.
 HDInsight Kafka Service Maintenance Mode
 HDInsight HDInsight Kafka Service Restart All
Kubernetes with Helm
- Nginx Controller
Lenses can be deployed with Nginx Ingress Controller in Azure with the following commands and additions in provided values for Lenses helm chart.
# Install NGINX Ingress controller
helm repo add incubator https://kubernetes-charts-incubator.storage.googleapis.com/
helm install stable/nginx-ingress --name <RELEASE-NAME>

# This will return the generated URL for Nginx Load Balancer
kubectl --namespace <THE-NAMESPACE-YOU-USED-TO-DEPLOY> get services -o wide -w <RELEASE-NAME>
When you run the above commands the NGINX ingress controller will be created and you will get an EXTERNAL IP. For Lenses ingress deployment with Helm you need an FQDN for host value. You need to run the following script to generate a DNS name:
#!/bin/bash

# Public IP address of your ingress controller
IP="<EXTERNAL-PUBLIC-IP-ADDRESS>"

# Name to associate with public IP address
DNSNAME="<YOUR-DNS-NAME>"

# Get the resource-id of the public ip
PUBLICIPID=$(az network public-ip list --query "[?ipAddress!=null]|[?contains(ipAddress, '$IP')].[id]" --output tsv)

# Update public ip address with DNS name
az network public-ip update --ids $PUBLICIPID --dns-name $DNSNAME
Now you need to fill the following values for Lenses Helm deployment:
restPort: 3030
servicePort: 3030

service:
  enabled: true
  type: ClusterIP
  annotations: {}

ingress:
  enabled: true
  host: <GENERATED-LB-NGINX-URL>

  annotations:
    kubernetes.io/ingress.class: nginx
- Traefik Controller
Lenses can be deployed with Traefik Ingress Controller in Azure with the following commands and additions in provided values for for Lenses helm chart.
# Install NGINX Ingress controller
helm repo add incubator https://kubernetes-charts-incubator.storage.googleapis.com/
helm install stable/traefik --name <RELEASE-NAME>

# Traefik's load balancer state
kubectl get svc <RELEASE-NAME>-traefik -w

# Once 'EXTERNAL-IP' is no longer '<pending>':
kubectl describe svc <RELEASE-NAME>-traefik | grep Ingress | awk '{print $3}'
When you run the above commands the Traefik ingress controller will be created and you will get an EXTERNAL IP. For Lenses ingress deployment with Helm you need an FQDN for the host value. You need to run the following script to generate a DNS name:
#!/bin/bash

# Public IP address of your ingress controller
IP="<EXTERNAL-PUBLIC-IP-ADDRESS>"

# Name to associate with public IP address
DNSNAME="<YOUR-DNS-NAME>"

# Get the resource-id of the public ip
PUBLICIPID=$(az network public-ip list --query "[?ipAddress!=null]|[?contains(ipAddress, '$IP')].[id]" --output tsv)

# Update public ip address with DNS name
az network public-ip update --ids $PUBLICIPID --dns-name $DNSNAME
Now you need to fill the following values for Lenses Helm deployment:
restPort: 3030
servicePort: 3030

service:
  enabled: true
  type: ClusterIP
  annotations: {}

ingress:
  enabled: true
  host: <GENERATED-LB-TRAEFIK-URL>

  annotations:
    kubernetes.io/ingress.class: traefik
Note
- If you receive an error with the service account which you will use (eg. default) about the followings:
- Failed to list v1.Endpoints: endpoints is forbidden: User
- Failed to list v1.Service: services is forbidden: User
Then you need to bind your service account with role cluster-admin with the following RBAC YAML:
apiVersion: rbac.authorization.k8s.io/v1beta1
kind: ClusterRoleBinding
metadata:
  name: fabric8-rbac
subjects:
  - kind: ServiceAccount
    name: <NAME-OF-YOUR-SERVICE-ACCOUNT>
    namespace: <NAME-OF-YOUR-NAMESPACE>
roleRef:
  kind: ClusterRole
  name: cluster-admin
  apiGroup: rbac.authorization.k8s.io
- Application gateway
Lenses can be deployed with Azure Application gateway. You need to follow the official repository documentation here.
When you run the above commands the Application Gateway ingress controller will not be created till you deploy Lenses which includes an ingress configuration for Application gateway. In Lenses values you need add the following options:
restPort: 3030
servicePort: 3030

service:
  enabled: true
  type: ClusterIP
  annotations: {}

ingress:
  enabled: true
  host:

  annotations:
    kubernetes.io/ingress.class: azure/application-gateway
Then check the Load balancer DNS FQDN with:
kubectl get ingress -o wide -w
If you specify a host for ingress, you need to add Application Gateway address to Azure DNS to be able to access it externally. Or, deploy external DNS to manage Azure DNS records automatically, which is also recommended.